House of Faux has always been about the promotion of other artists, products and schools, but recently someone commented that they would like to see more of a personal touch, so the following is for YOU. YOU know who you are!
Ok, so in an effort to motivate myself to actually do a tapestry, I have decided to "Tweet" and "Blog" about it. This way the pressure is on for me to create something if not spectacular, than at least appealing to some. So let me back up and give you some history behind this endevour...
On a recent trip to Laine Discepoli's charming
Misselaineous Studios in Ohio, I commented on a beautiful tapestry hanging on the wall of her studio and remarked how I had always wanted to try one. Laine said this was going to be part of her class, that all of us would get to create their very own. Yipee!
On the day of our tapestry creation I was a little in brain freeze mode not knowing exactly what to do with this blank canvas. I finally chose a stencil that was very elegant and ornamental. A design that I rarely use. Not only because I rarely get requests for this type of design in my decorative wall finishing, but also because I tend to gravitate towards the more modern and contemporary designs. However, after taping down the stencil and picking out some colors I started the task of stenciling the design. The stenciling part itself I found a little tedious and boring, but loved throwing some glitter down and adding some glaze to the overall piece. I was just hitting my stride and really getting into doing this when the clock struck 4 and I had to get ready to head to the airport. Unfortunately, the half done, still wet canvas couldn't make the trip back with me, but I await its return via some postal service of Laines choosing.
Fast forward to two weeks later and here I again stare at a white canvas wondering what in the sam hill I am going to do with it. Soooo, here we go....Canvas #1 1/2.
 |
Day 1
|
(do you hear the crickets chirping?)
 |
| Day 2 |
 |
| The beginning |
Ok, seriously! I am going through my sorry excuse for a stencil collection and put some things together. Note to self: Self, buy new stencils this year!
So, I finally chose some stencils and after taping down I am using some spray paint over the design. I do this for a couple of reasons. For one thing it is easier for me to see how all the designs will be laid out and the second reason, if I ever mess up and the stencil moves then I know where it goes. I know the pro stencilers are shuddering!
For colors I am going through my stash of little paint bottles and picking the ones that are getting old just so I can use them up. I don't care if the colors are not perfect because this will only add to the design.
 |
| Step 2, stencil colors |
 |
After removing stencil
|
I am off to the store to get some fabric for sides and bottom and also need a rod to hang the tapestry. I will also be applying glaze to the design. Stay tuned....
After the designs dried I rolled a glaze on and made some "age spots", to give it an old look.
2 hours later...Didn't like where this canvas was going so I started over! Here we go...
 |
| Taa da |
So an hour later and I have done the above canvas. I wanted to use some brighter colors and added some sparkle.
 |
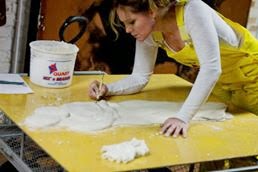
| Rolling on a light green metallic mixed in Proceed's Glazing Texture. |
After applying the glaze, I rolled on Proceed's glass beads slightly tinted. I then glued some tassel fabric on the bottom of the tapestry and some ribbon on the sides to hide my bad cutting job and let it all dry.
The last steps were to apply some of Proceed's plaster randomly on the canvas. I also highlighted some of the designs with some glitter. I bought a dowel and spray painted. Here is the result.


Comments
Post a Comment